跳到主要內容

V-USB Joystick for Arduino

上次做好沒存檔

這次再翻出來從弄一次...QAQ
花了我一天阿阿阿阿

D+ 接腳2
D-  接腳3
詳情請看usbconfig.h

想改搖桿配置可以用
HID Descriptor Tool
改完記得回usbconfig.h填
USB_CFG_HID_REPORT_DESCRIPTOR_LENGTH
長度


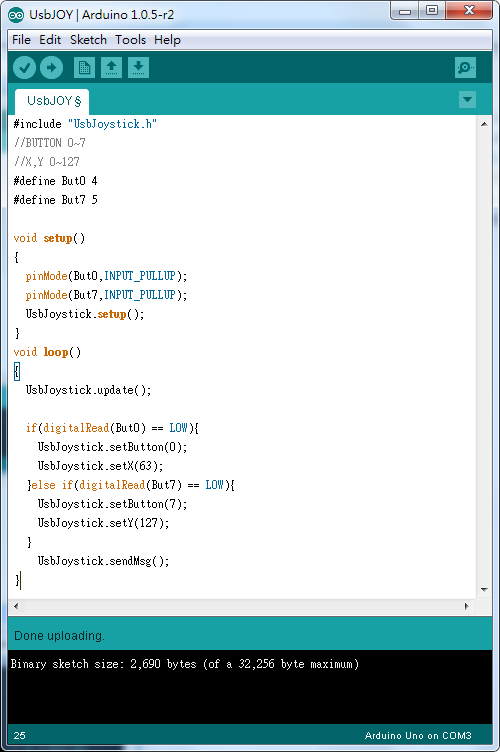
程式碼:https://www.dropbox.com/s/n0rgkb370wto2lv/UsbJOY.rar?dl=0

留言

  1. Hi, Sir ! your library is amazing ! amazing ! the best library on entire world ! 8 buttons ! fantastic ! congratulations ! you're a genius ! just one question: how the axis X and Y works ? because i'm trying to play a game, like a test , and the character go up even if i'm not press any button. How can I manage the axis ? i want to make a simple gamepad with up,. down, left , right and the 8 buttons. Can you help me, please ?

    Thank you !

    *Ps: Again, amazing library !

    Greetings !

    回覆刪除
    回覆
    1. 使用
      analogRead(PinX); analogRead(PinY);
      去讀取數值並設置
      UsbJoystick.setX(ValueX);UsbJoystick.setY(ValueY);

      use
      analogRead (PinX); analogRead (PinY);
      To read and set values
      UsbJoystick.setX (ValueX); UsbJoystick.setY (ValueY);

      -----------------------------------------------------------
      const int PinX = A0;
      const int PinY = A1;

      ValueX= analogRead(PinX);
      ValueY= analogRead(PinY);
      UsbJoystick.setX(ValueX >> 3); //X,Y 範圍 0~127
      UsbJoystick.setY(ValueY >> 3);

      //我沒測試過
      //需要自己在修改
      // I have not tested
      // Need to modify them again

      刪除
    2. Sorry, Sir ! I'm late to thank you! I got it ! I used the map function! thank you for this magnificent work! thank you so much ! with a bluetooth module HC-06 and a android device, I created a simple application. With this application, you can simulate a Bluetooth gamepad, although there is no "multitouching".

      The application is made in the "App Inventor 2". Therefore, there is no way to enable multitouching. But it works! I do not know how to thank you. Also, you have that V-USB MIDI library. I'm trying to make a MIDI adapter for an old Yamaha keyboard. You are very talented ! Westerners need to learn from you.

      You come to also modify the V-USB Keyboard and Mouse libraries? If yes, please, if you can make them available, I would greatly appreciate it. Their V-USB libraries are much more efficient and objective than those made in the Western Continent.

      If you want the code that did and the application of "BTGamepad" based on your project, please just ask me when you want.

      Thank you very much !

      刪除
    3. V-USB Keyboard and Mouse libraries can be found here

      http://coopermaa2nd.blogspot.tw/2011/10/v-usb-examples-for-arduino.html

      http://coopermaa2nd.blogspot.com/2011/10/v-usb-for-arduino-usbkeyboard.html

      :)

      刪除

張貼留言

這個網誌中的熱門文章

小蟻智慧攝影機支援RTSP

來源: http://en.miui.com/thread-196713-1-1.html 小蟻智慧攝影機版本: 1.8.5.1l_201511061661(台灣版) 下載檔案 https://drive.google.com/file/d/0ByjBix7wpeJJY0ZWZXlvWl9Za1E/view?usp=sharing 把攝影機SD卡拿讀卡機讀取 把壓縮檔內的test資料夾放進SD根目錄 插回SD卡至攝影機 重開 攝影機會呈現橘燈並執行更新 等恢復至藍燈或是用app確認攝影機開啟 用VLC或相關程式讀取串流 Main stream:rtsp:// <CameraIP> :554/ch0_0.h264 Minor stream:rtsp:// <CameraIP> :554/ch0_1.h264 Audio stream:rtsp:// <CameraIP> :554/ch0_3.h264 Telnet與FTP開啟加上 # Telnet if [ ! -f "/etc/init.d/S88telnet" ]; then     echo "#!/bin/sh" > /etc/init.d/S88telnet     echo "telnetd &" >> /etc/init.d/S88telnet     chmod 755 /etc/init.d/S88telnet fi # FTP echo "#!/bin/sh" > /etc/init.d/S89ftp echo "tcpsvd -vE 0.0.0.0 21 ftpd -w / &" >> /etc/init.d/S89ftp chmod 755 /etc/init.d/S89ftp User:  root Password:  1234qwer 使用passwd改密碼 參考: http://en.miui.com/thread-224653-1-1.html

Arduino 滑鼠滾輪編碼器/旋轉編碼器

滑鼠拆下來的滾輪編碼器 時序為                      → CW A  -----------          -------------    HIGH                ----------                  LOW                      ← CCW B  --------          ----------------    HIGH             ----------                     LOW A B 1  1↓CW 1  0 0  0 0  1 1  1 1  0 0  0 0  1↑CCW 程式碼參考底下網址來源修改而來 #define ENCODER_A_PIN 2 #define ENCODER_B_PIN 3 unsigned long time = 0; long position = 0; long num = 0; void setup() { pinMode(ENCODER_A_PIN,INPUT); pinMode(ENCODER_B_PIN,INPUT); attachInterrupt(0, RotaryEncoder, LOW); Serial.begin(9600); time = millis(); } void loop() { while (num != position) { num = position; Serial.println(num); } } void RotaryEncoder(){ int temp =digitalRead(ENCODER_B_PIN); if ((millis() - time) > 3) { if ( temp == LOW) { position++; }else{ if ( temp == HIGH) position--; } } time = millis(); } 沒中斷版本 int trigger=0; void Rotar

Voip SPA3000/9000 設定

架設Voip 1.Analog Telephone Adaptor (ATA) 一個類比電話轉換到基於數位VoIP電話網路 An ATA contains the following components: FXS Ports – Used for interfacing with analog telephones. RJ45 Ports – Used for interfacing with the LAN/WAN FXO Ports – Used for interfacing with the PSTN 2.網絡電話交換機(IPPBX) 能通過IP網提供語音、視頻以及即時消息通信。這些通信不僅可以在企業內部網上進行,也可以通過Internet與外網甚至PSTN(Public Switched Telephone Network)電話間進行。 3.網路電話(IPPHONE) SPA921、支援SIP應用程式或電話 SPA3000設定 參照: 安德森技術備忘板 參照 OSSLab 的設定設完發現會PSTN接到來電時 等到 PSTN Answer Delay 秒數過後將會自動接起外線 仍然等待Voip分機接起話筒可能會造成撥打者不必要的電話費 可能原因是 Off Hook While Calling VoIP  被設為Yes SPA9000設定 Wan Setup Internet Connection Settings Connection Type: DHCP Static IP PPPOE PPPOE,DHCP DHCP,PPPOE SIP Hunt Groups: 設定群組獵線 群組號碼為500,分機100-102, 響鈴300秒 回到SPA3000 PSTN Line Dial Plan 2: 來電時將轉接至群組 發現的問題: 剛開機使用SPA3000 LINE1 撥打至PSTN Line 分機 在打外線會導致所有分機都將無法在外線 開完機後先用其他分機撥打測試後就可正常使用